

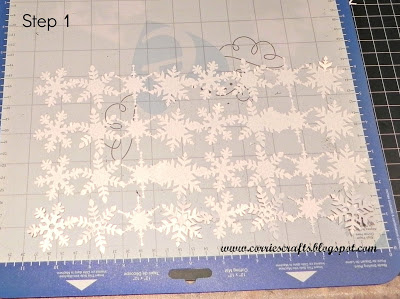
Step 1: Modify and size your shape as necessary and then cut four times, in my case I merged the design twice and then copied it four times. The more layers you add the more dimension you will get but if your design is very intricate and detailed it gets harder to match each layer.

Step 2: Carefully remove the design from the mat and line up how you will use them, if your paper has a good and bad side make sure you have the right side up

Step 3: Apply a re-positionable spray adhesive, use a spray for a light even coverage and re-positionable will give you some flexibility when matching the layers before setting permanently. Note because spray adhesive tends to splatter do this outside or in an empty box.

Step 4: Carefully match the layers up and press down, repeat for all layers. Note the more intricate and delicate the design the more difficult this will be. I sometimes use 5 layers but this design was intricate and it was getting difficult to keep everything together so I used four.

Step 5: Embellish as desired and attach to your project (I added some bling with the I-roc)

Products Used
- Evergreen Borough Distress Ink
- Snake Tape
- Cameo
- Winterland Collection pack by Fancy Pants
- I-Roc
- Spray Adhesive
- Iridescent paper
Great job! And the tutorial is really well done!
ReplyDeleteGreat tutorial! This really opens up a ton of possibilities for custom embellishments!
ReplyDelete